Configuring Kerberos for SharePoint
Kerberos has some advantages over NTLM. Only with Kerberos it is possible to pass the client credentials (meaning the user who logged himself on to the SharePoint website) to another server. This is important, if you use e.g. my Fileserver Access Webpart and configure it to a share on a server, which is **not** your SharePoint Server.
If you want to know more about Kerberos, you can look at Kerberos Explained on the Microsoft Technet pages.
You will also need Kerberos, if you want to connect to a SQL Database with the user account (Reporting Services).
[ ][1]
][1]
So what do we do about it? Well, lets add Kerberos Support for an existing SharePoint WebApplication. This will be [http://kerberos.moss.local][2] for this demo.
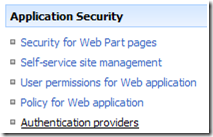
[ ][3]The existing WebApplication / IIS Virtual Directory is configured for NTLM. We can find out the current settings by going to the "Central Administration", "Application Management". Here we click "Authentication providers".
The settings for the default zone are
[ ][4]
][4]
Before we switch to "Negotiate (Kerberos)", we have some work to do:
- Install the Windows Support Tools (if not already installed)
- Identify data, which we will need
- configure Internet Information Server (IIS) to support Kerberos
- add a Service Principal name to the Service Account which is running the application pool
- enable delegation for the Service Account
- Configure SharePoint for Kerberos
Identify data
| Hostheader | http://kerberos.moss.local | Application Pool Service Account | moss\iissrv |
The account, which the Application Pool uses, should be a domain account!
Configure IIS
KB215383 describes how to configure Kerberos.
First you have to find the ID of your Web Application in the “Internet Information Services Manager”. In my case this ID is 978677539.
To change the Authentication settings, you need the ADSUtil.vbs script, which is usually in “C:\Inetpub\Adminscripts”.
With the ID, you can enable Kerberos in the commandline by typing:
cscript adsutil.vbs set w3svc/978677539/root/NTAuthenticationProviders “Negotiate,NTLM”
You can check if this setting was successfully, by typing:
cscript adsutil.vbs get w3svc/978677539/root/NTAuthenticationProviders
Add a Service Principal Name
Open up the ADSI Console to be able to add a Service Principal Name easily.
When you open “ADSI Edit”, you will need to navigate to the service account. Right click it, and look for “servicePrincipalName”. Then add “HTTP/kerberos.moss.local”. Yes, only one slash and no “:”.
Note: Even if you’ve used “http://kerberos” as hostheader, you’ll need to provide the FQDN as SPN! So in this example the hostheader would be “http://kerberos”, and the domain of the SharePoint server would be “moss.local”.
Depending on your domain operational level, you will get different points, where to activate delegation. With a native Windows 2000 domain functional level, the delegation option is under your Account tab. With a Windows Server 2003 domain functional level, you will get an extra tab within the Active Directory Object properties dialog.
 Delegation means, that this account may act on behave of other users. You can disable this for your Admin Accounts, if you wish so.
Enable the “Account is trusted for delegation” option for your Application Pool Account.
Just beneath this option, you see “Account is sensitive and cannot be delegated”. This settings can be set on important accounts like your Enterprise Administrator.
Configuring SharePoint for Kerberos
In your Central Administration go to “Application Management” and click “Authentication Providers”. After you have selected your Web Application, you can enable Kerberos.
After that, I restarted the IIS once again, and here we go… got Kerberos 😀
Troubleshooting
To be honest I don’t know why this example did not work in my testenvironment. I had to use the DNS name of my SharePoint Server instead of “kerberos.moss.local” as servicePrincipalName.
How did I find out? Well, I could not call the website from my client. The browser gave a 401 error, when I tried to call the SharePoint site. In the eventlog of my client I found that it was connecting to my DNS name, instead of kerberos.moss.local.
So if you experience a similar problem, look in the security log of your client, and adjust the servicePrincipalName accordingly.
Update 2/18/2009:
An explanation for the weired SPN if found a great post. It says that depending on your DNS record, the FQDN or servername will be checked for the SPN. Meaning: DNS goes to a cname, that cname will be resolved to an a record. And that one is used for Kerberos.
Source: http://www.bibble-it.com/2007/07/06/sharepoint-reporting-services-and-kerberos-authentication
Update 4/8/2009:
A checklist for activating Kerberos can be found here: http://sharepointhack.spaces.live.com/blog/cns!750308CEC39BDAB2!203.entry
“So the other day I felt like a real chop as I “assumed” something was done while I was setting up Kerberos, we all know that assumption is mother of all youknowwhats. So here I have put together a “Kerberos Checklist” which should help to troubleshoot the main issues related to the setup of Kerberos in your SharePoint 2007 environment.”


